
Have you ever wondered why your Freightliner Cascadia does not feel as smooth as it should, even when everything seems fine? In many cases, the answer comes down to something simple like the air filter system.
Keeping up with regular maintenance goes a long way in making sure the truck runs reliably on the road. One area that often gets overlooked is the air filter system, even though it plays a key role in engine performance, cabin comfort, and air system reliability.
From what we see in day to day truck service, clean air filters help maintain steady airflow, support better fuel efficiency, and keep the driving experience comfortable during long hauls. When filters are checked and replaced on time, it reduces the chances of unexpected stops and keeps the truck operating the way it should.
At Truck N Trailer Roadside, we focus on keeping trucks moving with reliable, on-site service and practical maintenance support. Working regularly with Freightliner Cascadia trucks, we understand how proper filter maintenance helps prevent avoidable issues and keeps performance consistent.
In this article, we will walk through how to check and replace the engine air filter, cabin air filter, and air dryer filter on a Freightliner Cascadia. We will also cover filter locations, replacement intervals, and when it makes sense to rely on a Mobile Truck Repair Service for support.
Why Freightliner Cascadia Air Filters Matter
Air filters are connected to three important systems in the truck, and each one serves a different purpose.
- Engine Air Filter
The engine air filter protects internal components by keeping dirt and debris out of the engine. It also helps maintain proper airflow, which supports fuel efficiency and engine performance.
- Cabin Air Filter
The cabin air filter supports HVAC airflow and helps maintain a comfortable environment during long drives.
- Air Dryer Filter
The air dryer filter removes moisture from the compressed air system. This is especially important for brake system safety and preventing internal corrosion.
Common Signs for Clogged Filters
| Symptom | Likely cause | Risk level |
| Black smoke from exhaust | Engine filter restriction | High |
| Weak A/C airflow | Cabin filter clogged | Medium |
| Reduced throttle response | Engine filter blockage | High |
| Musty cabin smell | Cabin filter + mold | Medium |
| Water droplets in air tanks | Air dryer failure | Critical |
| Frequent compressor cycling | Air dryer moisture | High |
| Lower MPG (5–10% drop) | Engine filter restriction | Medium |
Types of Air Filters in a Freightliner Cascadia
When performing maintenance, knowing which filter does what and where it is located saves time.
| Filter type | Main Purpose | Key Risk if Ignored | Common location | Replacement Interval |
| Engine Air Filter | Protect engine and airflow | Engine wear and power loss | Driver side housing | 15k–30k miles |
| Cabin Air Filter | Clean air inside the cab | Poor airflow and discomfort | Passenger side / glove box | 15k–25k miles |
| Air Dryer Filter | Remove moisture from air | Brake system issues | Near air dryer assembly | Annual inspection |
Freightliner Cascadia Cabin Air Filter Locations by Model Year
Cabin air filter placement in a Freightliner Cascadia has changed over the years.
2008 to 2017 Models
In these earlier models, the cabin air filter is usually:
- Located behind the HVAC housing
- Positioned along the passenger side firewall
- Accessed from inside the cab by removing trim panels
Most setups in this range use a single cabin filter, so replacement is fairly straightforward.
2018 to 2023 Models
In newer Cascadia trucks, the layout becomes a bit more flexible:
- The main filter is typically behind the glove box or passenger side dash
- Some sleeper models include an additional filter in the bunk area
One important detail we always check is the airflow direction. The arrow on the filter should point toward the cab. If it is installed the wrong way, airflow will be restricted even with a new filter.
2024 to 2026 Models
With the latest models, filter placement depends more on the truck setup:
- Day cab and sleeper trucks may have different locations
- Some trucks include an exterior cabin air filter in the engine bay
- Interior and bunk filters may be separate components
- Trucks with APU units can have additional filters under the bunk
Due to these variations, it is not always possible to find a solution that fits everyone.
Key Signs Your Air filter for Freightliner Cascadia Needs Replacement
Engine Air Filter Symptoms:
- Black or dark smoke from exhaust during acceleration
- Reduced throttle response or sluggish power delivery
- Lower fuel economy (5–15% MPG drop)
- Turbo lag or delayed boost response
- Check engine light (in some cases)
Cabin Air Filter Symptoms:
- Weak A/C or heating airflow from vents
- Dust accumulation on dashboard and cab surfaces
- Musty or stale odor inside cab (indicates mold)
- Difficulty defrosting windshield in cold weather
- Allergic reactions or respiratory irritation while driving
Air Dryer Filter Symptoms:
- Moisture visible in air tanks during inspection
- Air pressure warning lights on dashboard
- Frequent compressor cycling (running more than normal)
- Sluggish brake response or spongy pedal feel
- Rust or corrosion inside air lines
A safety-critical issue requiring immediate attention is moisture in brake tanks associated with air dryer cartridge failure.
What Are The Tools Needed Before Starting?
Before you begin any filter replacement, gather these essentials:
- Nitrile gloves (protects hands from dirt and oil)
- Flashlight or headlamp (visibility in tight spaces)
- Socket set (10mm, 13mm, 15mm common)
- Replacement filter (verified for your model year)
- Shop towels or rags (cleanup)
- Safety glasses (protects eyes from debris)
- Drain pan (for air dryer work)
- Torque wrench (optional but recommended for housing bolts)
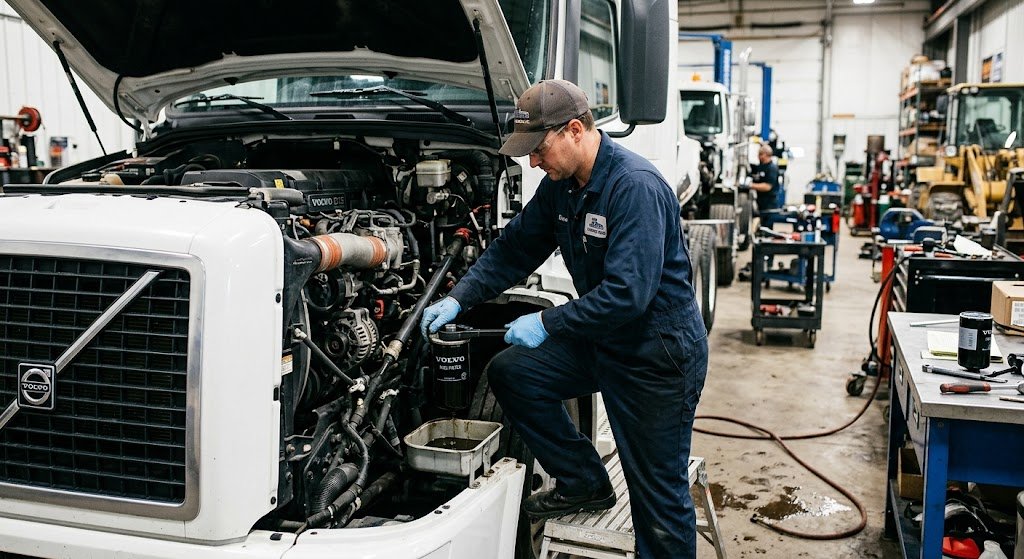
How to Change Freightliner Cascadia Engine Air Filter?
The engine air filter is the most frequently replaced filter and typically the easiest to access.
Step 1: Park Safely and Prepare
- Park on level ground away from traffic
- Turn off engine and allow it to cool for 5 minutes
- Engage parking brake
- Open hood and locate air cleaner housing (driver-side engine bay or frame rail)
Step 2: Locate the Air Cleaner Housing
The air filter housing is typically a large plastic or metal box on the side of the engine. On Cascadias, it’s usually mounted:
- Driver-side of engine compartment
- Along the frame rail
- Near the turbo inlet
Use your flashlight to identify the housing and note bolt locations.
Step 3: Remove the Housing Cover
- Use a 5/16-inch socket or 8mm socket to remove four bolts securing the cover
- On some models, you may encounter plastic clips instead of bolts—gently pry these upward
- Carefully lift the cover away from the housing
- Set bolts aside in your magnetic parts holder to prevent loss
Warning: Do not force the cover. If it’s stuck, check for additional fasteners or clips you may have missed.
Step 4: Inspect and Remove the Old Filter
- Note the orientation of the old filter (airflow arrow direction)
- Gently pull the filter straight out, it may require a slight wiggle
- Inspect the filter for excessive dirt, oil residue, or damage
- Check the housing interior for debris, oil, or contamination
Step 5: Clean the Housing Interior
- Use shop towels to wipe out any dirt, dust, or debris
- Pay special attention to corners and seams where contaminants accumulate
- Do not use compressed air, as this can force debris deeper into the engine
- Install the new filter after the housing has been completely dried
Step 6: Install the New Filter
- Slide the new filter into the housing, ensuring it seats properly
- Verify the airflow arrow points toward the engine (away from the intake)
- The filter should fit snugly without forcing
- Confirm the filter is fully seated in all corners
Critical: Incorrect airflow direction reduces filtration efficiency and can damage the turbo. Always verify arrow orientation before reassembling.
Step 7: Reassemble the Cover
- Place the cover back on the housing
- Hand-tighten bolts first to ensure proper alignment
- Use your socket wrench to tighten bolts in a cross pattern (like tightening wheel lugs)
- Tighten firmly but do not over-torque, plastic housings crack easily
- Recommended torque: 8–12 foot-pounds (if your wrench has a torque setting)
Step 8: Reset Restriction Indicator (If Equipped)
- Some Cascadias have a visual air filter restriction indicator on the housing
- If your truck has one, press the reset button after installation
- This prevents false warning lights
How to Replace Freightliner Cascadia Cabin Air Filter?
Cabin air filter replacement improves HVAC performance and eliminates odors.
Step 1: Open the Passenger Access Panel
- Sit in the passenger seat
- Locate the glove box (2018+ models) or lower dashboard trim panel (2008–2017 models)
- For glove box access: open the glove box fully and locate the release clips on both sides
- Gently pull the glove box toward you until it disengages
- For trim panel access: use a plastic pry tool to carefully remove clips along the lower dashboard edge
Warning: Do not force plastic clips, they break easily. Work slowly and methodically.
Step 2: Locate the Cabin Air Filter Housing
- Behind the glove box or trim panel, you’ll see a rectangular plastic housing
- The housing typically has two or four clips holding the cover in place
- Use your flashlight to identify the exact location and clip positions
Step 3: Remove the Old Filter
- Release the clips on the filter housing cover
- Gently pull the cover away from the housing
- Slide the old filter out carefully, it may be dusty or moldy
- Inspect the housing for debris, mold, or water damage
Step 4: Clean the Housing
- Use shop towels to wipe out dust and debris
- If you notice mold or moisture, spray the housing with a mild disinfectant (optional but recommended)
- Make sure the housing is completely dry before installing a new filter
- Check for any visible damage to the housing seals
Step 5: Install the New Filter
- Slide the new filter into the housing
- Ensure the airflow arrow points toward the cab (into the HVAC system)
- Freightliner’s maintenance documentation specifically notes arrow direction should point toward the cab interior
- The filter should fit snugly without forcing
- Confirm the filter is fully seated on all sides
Step 6: Reassemble the Housing
- Replace the housing cover
- Secure all clips firmly until you hear a click
- Reinstall the glove box or trim panel
- Verify the glove box closes smoothly and all clips are engaged
Pro Tip: If you notice musty odors after replacement, the HVAC housing may have mold growth. Consider running the A/C on high for 10 minutes with the windows down to flush the system.
How to Replace Freightliner Cascadia Air Dryer Filter?
Air dryer filter replacement is critical for brake system safety and requires careful attention to moisture.
Step 1: Locate the Air Dryer Assembly
- The air dryer is frame-mounted, typically on the driver-side frame rail
- It’s a cylindrical or rectangular component connected to the air compressor
- Use your flashlight to trace air lines from the compressor to the dryer
- The dryer cartridge is usually accessible without removing other components
Step 2: Prepare for Cartridge Removal
- Make sure the engine is turned off and has cooled
- The air system should be depressurized (air pressure at 0 PSI)
- If pressure remains, slowly open the manual drain valve on the dryer to release residual pressure
- Place a small container underneath to catch any moisture or oil
Safety Warning: Compressed air can cause injury. Never point air lines at yourself or others. Always depressurize the system before opening any air components.
Step 3: Remove the Old Cartridge
- Locate the cartridge housing bolt or spin-on cartridge
- If bolt-mounted: use an appropriately-sized wrench to remove the cartridge bolt
- If spin-on style: rotate counterclockwise by hand or with a filter wrench
- Carefully remove the old cartridge and inspect it for moisture, oil, or contamination
- Empty any liquid from the cartridge into your container (this is normal)
Step 4: Inspect the Housing and Seals
- Examine the housing interior for corrosion, rust, or debris
- Check the rubber seal or O-ring for cracks or deterioration
- If the seal is damaged, replace it with the new seal included in your replacement cartridge kit
- Wipe the housing clean with a shop towel
Step 5: Install the New Cartridge
- If your replacement includes a new O-ring or seal, apply a thin layer of silicone grease to the seal
- Insert the new cartridge into the housing
- If bolt-mounted: hand-tighten the bolt first, then use a wrench to secure it firmly (do not over-torque)
- If spin-on style: hand-tighten until the seal contacts, then rotate an additional 3/4 turn
- Do not over-tighten, this damages seals and makes future removal difficult
Step 6: Verify Installation and Test
- Close any drain valves you opened
- Start the engine and allow the compressor to build air pressure
- Listen for normal compressor cycling (should cycle less frequently than before)
- Check for air leaks around the cartridge connection
- Inspect the dryer housing for any moisture weeping
Expert Note: A damaged dryer housing or a too-wet compressor can cause moisture to build up in your brake tanks after cartridge replacement. Consult a mobile truck repair technician.
Safety Warning for Brake Systems
The air dryer filter freightliner cascadia is critical for brake safety. Moisture in brake systems causes:
- Reduced braking efficiency
- Corrosion of brake components
- Air pressure fluctuations
- Potential brake failure in extreme cases
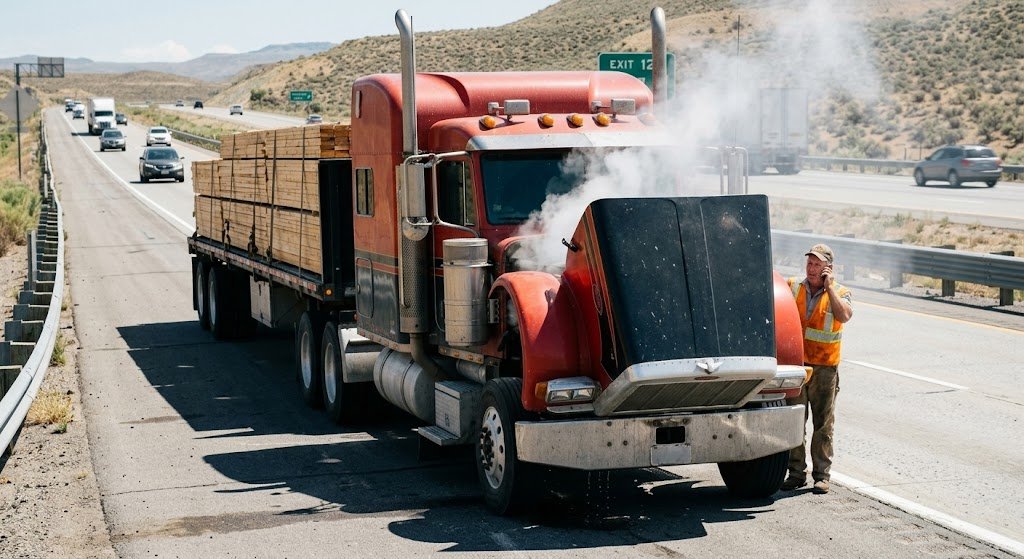
Never ignore air dryer maintenance. If you’re unsure about the replacement, call a mobile truck repair service.
ALSO READ: Watch How to Change Volvo VNL Fuel Filter
How Often Should You Replace Freightliner Cascadia Filters?
| Filter Type | Recommended Check Interval | Replacement Interval | Operating Condition Adjustments |
| Engine Air Filter | Every 15,000 miles | 15k–30k miles | Dusty/desert routes: 10k–15k miles |
| Cabin Air Filter | Every 15,000 miles | 15k–25k miles | Urban/high-pollen areas: 10k–15k miles |
| Air Dryer Filter | Annual inspection | 12 months or annually | High-humidity regions: 6-month checks |
Factors That Accelerate Filter Clogging
- Dusty or desert driving conditions
- High-pollen seasons (spring/summer)
- Frequent idling or low-speed city driving
- Towing heavy loads (increases air demand)
- High-humidity or wet climates (air dryer)
- Unpaved road driving
Fleet Recommendation: Establish a preventive maintenance schedule based on your typical routes. Owner-operators in dusty regions should check engine filters every 10,000 miles rather than waiting for 15,000-mile intervals.
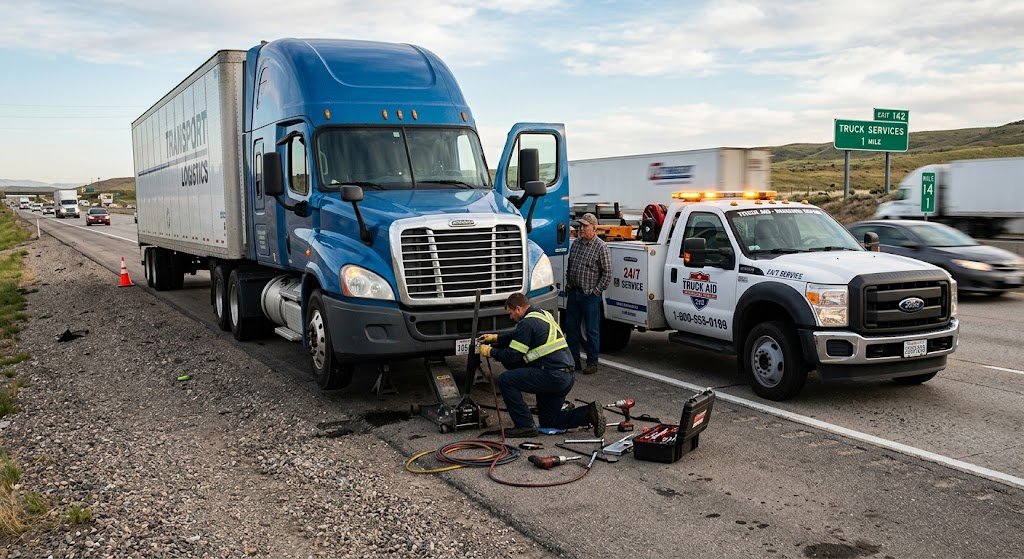
DIY vs. Calling a Mobile Truck Repair Service
Knowing when to handle maintenance yourself versus calling professionals prevents costly mistakes and roadside emergencies.
DIY Works Best When:
✓ You have basic tools (socket set, wrench, flashlight)
✓ Your truck is parked safely in a secure location
✓ No warning lights are illuminated
✓ You have 30–45 minutes available
✓ You’re comfortable working under the hood
✓ Filter replacement is routine maintenance (not emergency)
✓ You have the correct replacement filter part number
Call Mobile Truck Repair When:
✗ Brake air system warning lights appear
✗ Air pressure won’t build above 80 PSI
✗ Compressor cycles abnormally (every few seconds)
✗ You’re stranded on the roadside
✗ Air lines are leaking or disconnected
✗ You notice water actively dripping from brake chambers
✗ You’re unsure about filter location or part compatibility
✗ The air dryer housing is corroded or damaged
In these situations, it is best to rely on a professional Mobile Truck Repair Service that can diagnose and fix the issue on site without delays.
Why Choose Mobile Truck Repair?
Truck N Trailer Roadside provide fast Mobile Truck Repair to owners, fleets, as well as roadside assistance in emergency roadside situations for Freightliner trucks. Our technicians:
- Diagnose air system issues in 15–20 minutes
- Carry OEM and quality aftermarket filters
- Provide same-day service across most regions
- Offer warranty on parts and labor
- Accept fleet accounts and credit terms
Emergency Roadside Service: If you’re stuck on the road with air pressure issues, call for immediate mobile repair rather than attempting DIY fixes that could damage your brake system.
Common Air Filter Freightliner Cascadia Mistakes
Avoid these costly errors during filter maintenance:
Mistake #1: Installing Filter Backwards
Problem: Airflow arrow pointing the wrong direction reduces filtration efficiency and can damage the turbo.
Solution: Always verify arrow orientation before reassembling. The arrow should point toward the engine (engine filter) or toward the cab (cabin filter).
Mistake #2: Ignoring Seal Damage
Problem: Cracked or deteriorated seals allow unfiltered air to bypass the filter, introducing contaminants into the engine.
Solution: Inspect all seals during replacement. Replace damaged seals immediately.
Mistake #3: Cleaning Paper Filters with Compressed Air
Problem: Compressed air forces debris deeper into the filter media, reducing effectiveness and potentially damaging the filter.
Solution: Never use compressed air on paper filters. Replace them instead. Compressed air is only acceptable for pre-filters or foam elements.
Mistake #4: Skipping Air Dryer Service
Problem: Neglected air dryer filters allow moisture to accumulate in brake tanks, causing corrosion and brake failure.
Solution: Inspect air dryer filters annually and replace them every 12 months, regardless of mileage.
Mistake #5: Buying Incorrect Aftermarket Filters
Problem: Non-OEM filters may not fit properly, have inferior filtration, or cause air leaks.
Solution: Always verify part numbers using your VIN. Purchase from reputable suppliers. OEM Freightliner filters are worth the investment for reliability.
Mistake #6: Over-Tightening Housing Bolts
Problem: Plastic filter housings crack when bolts are over-tightened, causing air leaks.
Solution: Hand-tighten first, then use a wrench to secure firmly. Target torque: 8–12 foot-pounds.
Mistake #7: Not Cleaning the Housing
Problem: Debris left in the housing contaminates the new filter immediately.
Solution: Always wipe the housing clean with shop towels before installing a new filter.
Final Thoughts
In summary, Freightliner Cascadia air filters play a greater role than most people think. It supports engine performance, keeps the cab comfortable, and helps maintain a reliable air system for safe operation.
From what we see in real service situations, small maintenance steps like checking and replacing filters on time can prevent larger issues down the road. It helps avoid unnecessary delays, keeps fuel efficiency steady, and reduces the chances of unexpected breakdowns.
At Truck N Trailer Roadside, we work closely with drivers and fleets to handle both routine maintenance and urgent roadside problems. Whether it is a clogged engine air filter, restricted cabin airflow, or moisture in the air system, our team provides on site support to get things back to normal as quickly as possible.
Having the right air filter, along with consistent inspections and a reliable mobile truck repair service, can reduce road failures. Our team at Truck N Trailer Roadside is available 24 hours a day to keep your truck moving.
Call us at 614-423-6164 to get immediate assistance.
FAQs
Where is the Freightliner Cascadia cabin air filter located?
The cabin air filter in a Freightliner Cascadia is usually located behind the glove box or on the passenger side dashboard. In older models, it may be found near the HVAC housing along the firewall, and some sleeper trucks include more than one cabin filter.
How often should we replace a Freightliner Cascadia engine air filter?
The engine air filter should be replaced every 15,000 to 30,000 miles under normal driving conditions. In dusty or heavy-duty environments, more frequent checks and earlier replacement are recommended.
What happens if an air dryer filter fails?
If the air dryer filter fails, moisture enters the air system and can affect brake performance. This can lead to corrosion, air pressure issues, and safety risks if not addressed quickly.
Can we drive with a clogged Cascadia air filter?
Yes, the truck can still run with a clogged air filter, but performance and fuel efficiency will drop. Over time, it can put extra strain on the engine and lead to more serious problems.
How much does a Freightliner air filter replacement cost?
Freightliner air filter replacement costs vary based on the filter type. Whether it is an engine, cabin, or air dryer filter, and whether the work is done through a Mobile Truck Repair Service.